Friday 30 May 2008

All Animation Completed - Edit Now Final

Today Dan the Animation Lead fanalised the enterance corridoor sequence, Yemi and Ben also met the animation deadline with ease as we had all the animation sequences by 11:30am this morning. With finishing the final edit in mind, Rob, and Myself sat down together and worked solidly so that the final edit was completely finished and timing concrete. After reviewing the animation, particular camera angles for the jungle, corridoor and rock chamber scenes had to be adjusted so that we got the best out of the really great animation that was recieved. Im very happy with the end result for the trap corridoor animation, Ben also took the anititive by animating a forward roll, first person camera and possible camera positions for his animations, one important idea he had was to establish the stone doors closing before the explorer was to try to dodge the traps, this creates a great level of tension and excitement. These shot compositions were then reviewed and tweaked by myself and rob to ensure that camera conventions and edit timings were kept, these cameras have replaced the boring tracking camera that used to follow the explorer into the corridoor.

Another change was Dan's forward tracking camera, instead of viewing the explorers run through the jungle face on, ive moved and composed the shot slightly diagonal from the character, allowing us to see all of the animation and frame the explorer and jungle nicer (framing the path the explorer is travelling from, gives the tracking camera more distance and depth). The shot is still a 3/4 body composition, keeping the audience closer to the character (more personal/connects us with the explorer).

I also adapted the animated tracking back camera framing the explorer running through the rock chamber, geting closer and more personal to the character, it seems to really bring the action closer to the audience, the idea is to feel and experience what the character is going through. Now that the edit, including fades, additive dissolves, cut timings is complete, the premeir file will now be rendered and given to Becky (Sound Designer) and Alistair (Score Composer) so that they can accuratley develop the music and sound effects further, ready for the music deadline on Friday 6th June. The conclusion of the final edit has helped me to view the film as a whole with no gaps or unfinished areas, its given me the chance to really nail down the final look and feel for the film, assessing cut speeds and cinematography. It had to be finalised today so that the process of importing animation into their relavent scenes and render/frame
planning would mean a much smoother final couple of weeks. Dan's input on the edit its really appriciated, his fresh eyes on the edit allowed him to spot areas myself and rob had potentially over looked.

The animatic/film edit has been a large focus for myself and rob, by continually revising plot structure, cameras, cuts, key adience focus points, atmospheres, energy, composition. For the past three days we have been up untill 5am thoroughly combing over the edit and cinemtography of the film, changing large areas to ensure that the audience fully understand the story, allowing the camera to tell the story rather than just placing random cameras. To ensure camera cuts and shot composition create/enhance the excitement and adventure in the story. Myself and Rob, as well as great input from Dan (Animation Lead), have just finished finalising the story structure and camera work. We asked for some professional input from cinematographer Gareth Munden and camera man Kevin Williamson who visited us last week and spent some time reveiwing our previous edit and giving productive advice and feedback (possible camera angles, camera conventions to follow, etc). With these notes in mind we have largely increased the number of cuts within scenes to emphaise the pace and action in the film, more cameras added, the addition of close ups and more frontal shots of the explorer so that the audience feel closer to main chararcter, experience the dangers from his view. We also spent alot of time working on the camera cuts, how the character would move in and out of shot, making the movemnet comfortable and less confusing. As the animation is being completed we are continually dropping it into the edit, moving away from blockout to final animation and lit sequences. Below is the final edit completely finished and timed out:


AZTEC ESCAPE FINAL FILM EDIT

Thursday 29 May 2008

Panning Shot/Canopy Establishing Shot Finalised

Finally finished the Jungle Environment! And its completely ready to render! The rendering schedule that Rob and I disscussed says that we have to be renderng the jungle by tomorrow night, so a day early isnt so bad! This section was hard to nail down, my methods for creating the panning shot and establishing shot worked really well, but they still needed finishing off. So Myself, Rob and Jenny sat down this evening and decided to get it done and out of the way. The tracking camera and bushes were already created by me last week, Jenny had finished her background painting and set up more of the alpha channeled planes to create the canopy, the only thing needed was to light the canopy and tweak areas in the painting using photoshop. We worked on Rob's computer and disscussed possible colours for the day to night transition part, added trees and extra mountains to the background painting (to create depth), dulled down the foggy areas and placed it into the edit. I thought the day to night transition could be done in photoshop, but Rob worked out how to key the colour changes in Premier Pro. The final colours used for the night shot were referenced from my colour tests/montages created in pre-production. The render pics below detail the final rendered panning shot and the day to night canopy establishing shot that we just finalised:


Render Shot from Panning Camera - Lighting finalised by Rob and Myself, Explorer runs into the distance as camera pans upwards through dense canopy.
(Focal Length 30, Widescreen 16:9, Resolution 1024 x 576)


Render Shot from Panning Camera - Lighting finalised by Rob and Myself, shot of leaf detail as camera starts to move out of the canopy, camera pans upwards and stop to establish temple.
(Focal Length 30, Widescreen 16:9, Resolution 1024 x 576)


Render Shot from Establishing Camera - Daytime Lighting finalised by Rob, Jenny and Myself
(Focal Length 28, Widescreen 16:9, Resolution 1024 x 576)


Render Shot from Establishing Camera - Nightime Lighting finalised by Rob, Jenny and Myself
(Focal Length 28, Widescreen 16:9, Resolution 1024 x 576)

Finalised Lighting In Jungle Set - 2

Myself and rob finally finished the lighting for the main jungle path run animation, the only bit left to do is to finalise the lighting for the Jungle canopy establishing shot. Apart from that the seven camera shots including the two tracking cameras showing the front of the explorer running are ready to be rendered. And the final lighting result is amazing! im so pleased with the way we completed the lighting, it tooks some very late nights but the result has been well worth the effort. My idea using the ceiling plane and directional light really creates a dramatic look and feel in the set, together with the leaf shallows on the floor, a stylistic but in a way, realistic effect is created. The bump maps on the tree bark highlighted by the directional light above, the dark foggy shadows really help contrast the pockets of light.

The same lights that myself and rob created when lighting jungle set 1 were imported into the jungle set 2 file. Two spot lights, ambient with EnviroFog connection, and 1 directional light, we tweaked the spot lights, highlighted specific areas and modelled loads of extra holes into the new ceiling plane. The ambient really helped lighting the explorers facial features when the lighting got too dark in places, infact for the tracking run we parented the ambient and fog node to the tracking camera, so that the lighing on his front and the fog saturation distance from camera stayed consistant we travel thoughout the set. A large amount of time was spent positioning the light pockets so that the explorer would run between them creating splashes of sunlight accross his face as he runs. Below show some of my favourite lighting compositions that Myself and Rob worked on for the second Jungle Set:


Final render of Static Camera 3 - Lit, Composed and Framed By Myself and Rob
(Focal Length 28, Widescreen 16:9, Frame Resolution 1024 x 576)


Final render of Static Camera 4 - Lit, Composed and Framed By Myself and Rob
(Focal Length 28, Widescreen 16:9, Frame Resolution 1024 x 576)


Final render of Tracking Camera 1 - Lit, Composed and Framed By Myself and Rob. When we were test rendering the tracking shots, we found that the explorers face would be visible and then move into complete darkness, to balance out the effects of this dramatic lighting we created a low intensity ambient light, changed its relationship with the set off and only affect the character. This created a sublte highlight on his face. And another trick we devised was parenting the main ambient and EnviroFog node to the tracking camera. This meant that as we moved throught the set, the fog saturation distance remained a constant distance from the camera nad character. Therefore removing the problem of the explorer travelling into denser fog.

(Focal Length 30, Widescreen 16:9, Frame Resolution 1024 x 576)


Final render of Static Camera 1 - Lit, Composed and Framed By Myself and Rob
(Focal Length 28, Widescreen 16:9, Frame Resolution 1024 x 576)

Final render of Tracking Camera 2 - Lit, Composed and Framed By Myself and Rob
(Focal Length 30, Widescreen 16:9, Frame Resolution 1024 x 576)


Final render of Static Camera 6 - Lit, Composed and Framed By Myself and Rob. We decided to add the fallen tree to match Dan's run cycle and small jump over some bushes, the environment was slightly too plain and needed something extra, proberly one of my personal favourites.

(Focal Length 30, Widescreen 16:9, Frame Resolution 1024 x 576)

Monday 26 May 2008

My Canopy Shot and Panning Camera Idea Tests

All the cameras and jungle sets are nearly complete and ready for lighting. For the past two days Myself and Jenny have been working on the last camera (nicknamed the 'the panning shot') and the final part of the jungle set, the canopy establishing shot. These were the hardest shots in the film so far, it was only hard because you need to think of a way of producing a canopy that looks great and vast, but build it in a way that minimises ploygon counts for rendering and general file size. After some planning I came up with two methods that successfully worked.

The first method was to create the illusion of the camera tracking through a long, dense, leafy canopy. For this I asked Jenny to send me a file with all of her flower and bush leaves seperated. I first animated the panning camera, so that i knew the distance that the camera would travel and finally stop to establish the entire jungle canopy a small distance above the trees. Using Jennys seperated leaves and flowers, I built layers of mixed leaves in front of the camera, doubling the thickness of the slowly forming canopy bush to create depth. I extended the bush upwards until the establishing camera shot was just framed with leaves. The playblast below shows one of my panning camera tests, though the speed is way to fast, the canopy bush idea was works really well, for the final rendered film i will add to the leaves at the bottom of the canopy and place vines reaching into the jungle path, this will then nicely result in the camera following the vines upwards into the dense canopy.


Playblast of Canopy Panning Camera Test


Screen Shot of Canopy Bush Area Build - My idea is that the camera will pass throught this area, the leaves have been placed, composed and layered to create the sense of a dense jungle canopy. I added large branches to finish the look.


Canopy Build Detal With Panning Camera Positioned

The second method was for the production of the jungle canopy establishing shot. The only way i could think of was to build rows of canopy bushes similar to those created for the panning through the canopy shot, but then take a lit rendered picture of the canopy bush, import into photoshop, alpha out the bush part of the render and apply the new .tiff to a polygon plane in Maya. Then layer up the planes, slightly varying the heights and types of the canopy bushes, as they stretch into the distance the illusion of depth and an endless jungle environment should be seen. After starting this I have now passed on the job to Jenny so that she can add a nicely painted background and create more variants of canopy bush. The job was passed to her as i need to carry on lighting the second jungle set ready for rendering on friday. Once this part of the set is fully lit i think it will produce a believeable dense canopy look.


Screen Shot of Canopy Establishing Shot Build - My idea was that the camera would leave the dense canopy and break open into a sunlit establishing shot of the tree tops and characters destination of travel, the temple. Using Jenny's alpha channels bushes i fgramed and composed the shot featuring the background landscape and temple (important audience focus point).

Sunday 25 May 2008

Jungle Layout Revision - Set Building

After completing the edit four days ago, alot of the main camera changes effected the cameras in the second jungle set. Following Gareth Munden's and Kev's advice this sequence needed alot of work, 90% of the shots were from behind the chararcter, a large majority tracking behind him. They mentioned that it did not connect the audience with the character and made the start of the film very unpersonal. Plus with the fast speed and energy that i wanted to incorporate into the film, there weren't enough cameras or cuts to produce it. The cameras were placed either side of the explorer which made the flow of the scene and travel of the explorer confusing and uncomfortable.

Therefore a major rework of the cameras was needed, and this was what we nailed down in the edit. The camera now cuts from a frontal tracking camera, to side shot of the explorer running away from the camera, then running towards the camera, but due to the cameras being placed all on one side of the charactrer, the flow is consistant, comforable, fast paced and his direction of travel within the jungle makes sense. During the film i wanted the camera work to feel natural, just like industry films where the audience doesnt even notice the camera change. This helps the audience focus on the action, story and animation, rather than an odd camera angle. But because of these drastic camera changes, the Jungle set that i built weeks ago needed to be re-worked. I built the set from the view of the previous tracking camera, now that we're veiwing the environment from in front of him, there are huge areas where vegetation didnt need to be built up but now there are huge gaps. All of the shot compositions for all the cameras need to be planned and the set re-built.


Plan View of Completed Jungle Set 2 Built by Myself - Includes main path and river sections
(AutoDesk Maya Screen Shot)


3/4 View of Completed Jungle Set 2 Built by Myself - Includes dense canopy and establishing canopy shot build
(AutoDesk Maya Screen Shot)

Over the past three days I have been composing all the shots using Jennys modelled plants and trees, ready for the animation to be imported and the set lit. The jungle environment was the hardest set to build as it needed to seem naturally full and believable as a dense jungle. I wanted to make sure that a good level of depth could be felt within each composition, framing cameras with plants and vines. I found that some of the camera compositions over lapped, which meant that as i changed one composition, it would effect another. The addition of Jenny's vines that i asked her to model gave the jungle added character. Below shows renders of some of the cameras featured in the second jungle set:


Camera 1 Completed and Finalised Composition (AutoDesk Maya Screen Shot)


Camera 2 Completed and Finalised Composition (AutoDesk Maya Screen Shot)


Camera 3 Completed and Finalised Composition (AutoDesk Maya Screen Shot)


Camera 4 Completed and Finalised Composition (AutoDesk Maya Screen Shot)


Camera 6 Completed and Finalised Composition (AutoDesk Maya Screen Shot)


Myself and Jenny created background plates with pre-rendered images of other parts of the jungle set so that it successfully gave the illusion of a deeper, extensive environment. The renders were taken using the basic lighting from jungle set 1, placed into photoshop, alphas created and then placed onto large polygon planes. To cover the large gaps in the set and due to the height needed, the background renders had to be rendered at the size 4096 x 4096.


Background Plate Test Render from Maya - Basic Lighting utilised from first Jungle Set, masked plane hitting jungle floor texture with Jenny's modelled plants, the method works very well and will be adopted into the second jungle set. The illusion really works well, making it look like the hazey jungle stretches behind the television/lounge props.


Background Plate Render for alpha channel creation in photoshop. Final output of these plates will be 4096 x 4096 so that detail isnt lost when picture is re-rendered in Maya and more importantly gives the illusion that the modelled plants and trees extend into the distance (trying to remove 2D look and feel from background areas). The final plates will be renders of the jungle set with the added pockets of sunlight and environment fog, this should improve its look of depth.


Another example of the Background Plate Render Method - alpha channel creation in photoshop. Final output of this plate will be 4096 x 4096 when placed into Jungle Set 2.

Im very pleased with the end result, it took so long to build the compositions, but it was well worth the time. To emphasise the life within the jungle I've asked Jenny to animate some butterflies she's modelled, this should just give the set some life and movement other than the character travelling through it. The hardest part of the set build was the frontal view (tracking camera x2) of the explorer running along the path, it took the most time out of all the shots because it isnt a stationay camera, to compose a moving camera with plants, trees and vines takes a great deal of planning, the background plates worked very well filling in exposed areas behind the tree and bush lines.


Tracking Camera Playblast - Known as Camera 5 in the film edit. Animated by myself, sequence will be chopped in half so that we can have quick cuts between the static and moving shots. No lighting as of yet, the panning shot is to be completed first and then we will move onto developing the lighting for the section jungle set.

Friday 23 May 2008

Animation Deadline Problem

After deligating the final animation scenes to Dan the Lead Animator, we realised that there were four scenes left animate and only a week left untill the deadline we set, Dan approached us this morning and said that i would be very difficult to have all the scenes done to a high standard by next friday. Dan reassured us that he could confidently get two of the four scenes completed but would apprieate the any extra help, perhaps another two animators to finish the rest. The only problem was that we have no more animators at our disopsal, luckily our Concept Artist Ben wants to get into the animation area, but with no previous animation experience, apart from a few minor scenes he animated for us, his euthusiasm and well timed animation, we have decided to hand the less of the challenging scenes to him. The last scene is quite animation intensive, intailing a rope swing and a lengthy run cycle (while dodging falling rocks), after an hour ringing around we hear Yemi, an animator from a different group has finished his group animation early, and so offered a weeks worth of animating help. With three animators working towards the deadline i am confident that we will be ready to render the following week. Plus Dan will be available to help with texturing the main temple chamber and corridoors.

The project so far is going well, we are all a bit stressed, been working untill 2/3am for the past week, just trying to tie up the loose ends so that the next couple of weeks go alot smoother, geting the edit nailed down has helped to organise the the final bits of animation, we've been able to give more precise timing within specific scenes and for desired shots, plus means that all we have to do is drop animation into the edit as the structure is aready present. Anything drastically wrong is highlighted quicker and can therefore be rectified sooner, which is great when it saves us time!

Thursday 22 May 2008

Final Edit/Animatic Re-Work

Though not all of the animation has been completed, Myself and Rob have deligated to the Animation Lead that all animation must be finalised and handed in by Friday 30th May next week. Once we have the final animated shots we will have all the scenes in the film timed out ready for the sound designers to start at the end of next week. The fine tuning of the final edit is key to the success of the film. My contentration has always been on the story and cinematography, making connections to the audience, enjoyable and easy to watch, rather than spending hours studying global illumination and dynamics. Below are some of the new cameras that we created using the advice of Kevin and Gareth (cinematography), ive placed a clip of the older cameras for the same section so that the differences are easier to contrast. Ro and myself also felt that it would be a great idea to add lighting to gain a better feel for the final edit:


Film Old Cameras


Film New Cameras

Though the cameras are developing, theres still an aspect of rigidness and slow paced action. I still feel that the camera work has a long way to develop, and rob and myself are more than willing to put a lot of extra hours into bringing this story to life. The rest of the camera work will be finalised once all the animation has been handed to me to be signed off.

Tuesday 20 May 2008

Character Texturing - The Wrap Problem

Its been a hard couple of days since the lighting was completed for the first part of the jungle set, it was nearly ready for rendering as i have been working on the textures for the explorer character, the basic colours were blocked in photoshop (using my main character photoshop painting produced in pre-production as a colour swatch reference) and i started adding detailed clothing textures to the t-shirt and jacket. Then we hit a huge problem...

The problem started back in March when i had completed the Explorer model and it was ready to be UVed, due to many dissertation problems i didint have the time to UV my modelled character, animation and more importantly rigging needed to start so we decided that we could wrap deform a UVed explorer mesh to the rigged and animated one, proberly close to rendering time. With this in mind i left it to complete my dissertation. But the problem crept back on me yesterday, the wrap deform mesh that i UVed last week wouldnt work, every computer in the house crashed when applying the wrap, the method would work successfully but the computers couldnt handle it. As these are the computers that we will finally render on the wrap method cant be used. Which leaves us with a fully rigged, weighted and animated character not UVed! And so cant be textured! Myself and Rob discussed it and we have decided to block colour the polygon faces of the main character in Maya. The same colour swatches i designed in pre-production are to be used. So for the past day ive block coloured three explorer characters and placed one into the jungle scene.


Screen Shot of my block coloured explorer character in AutoDesk Maya - The desired poygon faces were highlighted, a quick set selection saved (reduce selection time later on in colouring process) and then block coloured using my pre-designed colour swatches.


Another two screen shots of my explorer character in AutoDesk Maya - swatches are fully finalised, character posed and smoothed.

The end result.... was actually really surprising! Aztec Escape has a simple artistic style, the sleeping character was more or less coloured in the same way, and so the character fits into the jungle environment and looks great! I had worries of the quality deminishing due to the wrap problem, but infact it works better than having a realistic and detailed character texture. Every piece of Explorer animation done will have to have its chararcter block coloured, this will take time, but is far more quicker than re-rigging, weighting and animating.


Final Render Shot of Coloured Explorer in Final Lighting - Jungle Environment Set 1. The primitive block colour texturing actually suits the style of the film, which is a great relief as i really wanted to texture the charcter properly.

Monday 19 May 2008

Final Jungle Lighting - SET 1

Since performing the jungle lighting tests, Myself and Rob reviewed the idea and finalised it for the actual first jungle set. I knew that the intensity of the directional lights were way too harsh for the foreground part of the composition, but the effect of the strong sunlight on the bump mapped trees and background bushes worked really well. We changed the directional intensity from 2.4 to 0.9, this gave a much more balance light effect throughout the whole composition. The total lights in this part of the jungle set are - one main spot light (foreground) two small, low intensity spotlights, one directional light and one ambient light with an attached EnviroFog connection. The fog gives depth to the scene, darkening and blurring distant areas of the jungle environment, and emphasies the (directional light) sunlight pockets. We cut more holes into the ceiling plane above so that there were more dramatic shafts of light falling upon the surrounding vegetation and one to highlight the explorer chararcter. The idea of placing the leaves around the cut holes in the ceiling plane was carried forward from my previous lighting tests, this successsfully created the illusion of the sunlight travelling through a dence leafy canopy above (and removed the need for modelling a very high polygon jungle canopy!). As can be seen from the render images below the overall atmosphere created was great, and almost perfectly mirrors the jungle I visualised during the pitching process and pre-production.


Maya Render showing finalised shot composition and lighting. EnviroFog used with Saturation Distance 70, main diectional spot light for sunlight, three spot lights, one to draw audience focus to map/sofa area. (Render Time - 1min 50 secs with Maya Software
Rendering).


Maya Render showing background light details. We placed the lights so that the directional light fell over leaf tips and tree bark, defibatley gives the shot/environment depth. This shot was taken from the final animated camera movemnet. The directional light intensity has been redued to 0.9, plus a soft spot light placed to illuminate the background slightly.
(Render Time - 1 min 42 secs with Maya Software Rendering).

There was one technical hitch that we came across, which mean't that the rays of foggy sun light couldnt be added to the composition. Due to the limitations of Maya software rendering, creating actual 3D fog and lightrays wasn't possible, Mental Ray wasn't an option as we planned a productive and tight rendering schedule and so we decided to use a simple 2D idea using alpha channeled coloured rays created in Photoshop. The method created mixed results, either the rays were too transparent that you couldnt notice them or they were to opaque and set looked polluted and smoggy. Large amounts of time couldnt be wasted this close to rendering deadlines just on creating light rays, therefore myself and rob made the decision to scrap the idea. To save time and to keep lighting constistancy, the same lights used in Jungle Set 1 will be imported into Jungle Set 2 (path and river area), the lights will just be moved and tweaked to accomodate particular environment and chararcter focus points within the different areas of the next jungle set.

Thursday 15 May 2008

Jungle Lighting Idea

Ive been playing around with the jungle lighting a a bit recently and came up with an idea about creating the pockets of sunlight, the problem was that we can only use up to six spot lights in one scene, and the effect wasnt that sharp enough, so i desided to model a plane as a ceiling for the set, cut holes in various places and place a few directional lights above the set, each at about 0.5 intensity, the other lights in the scene were kept to produce the dark canopy part, the rendering took slightly longer, but on Robs PC was even quicker so render time shouldnt be a problem. The test actually worked with really pleasing results!

Rob and Myself will sit down and refine the idea. Once the intesities have be perfected, we can move the holes around to cast sunlight pockets over desired areas of trees and shrubs, and then finally add the 2D light ray planes and Jenny's butterflies. I asked Jenny to sought and cut down her modelled jungle leaves to place around the cut holes in the ceiling, this should remove the sharp polygon edges of the lightpockets and instead cast leaf shapes/shadows, thus creating a canopy effect!


Most recent Jungle Lighting Test, Produced by Myself - Using ceiling and holes idea, together with original lighting and added directional lights. Intensities and positioning still to be developed by Myself and Rob. (Maya Software, Render Time 5mins 3secs but only 2mins 20secs on Robs Computer)


Jungle Lighting Test, Produced by Myself - Using ceiling and holes idea, together with original lighting and added directional lights. Intensity of Directional Lights needs to be increased, more sunlight pockets needed with better positioning. (Maya Software, Render Time 4mins 50secs)

Jungle Environment Lighting

As the modelling has almost stopped and the texturing well on its way, Myself, Jenny and Rob decided to sit down and discuss the lighting issues for the jungle. The render pics below show some of the many stages of testing we have done so far.

Im really happy with the development so far, but im still only 90% sure that this will be the lighting for the final render, the dark shadows cast by the canopy above, the depth of the scene and the fog work really well... but it still needs something to bring it to life. I visualised it with large pockets of sunlight, its rays softly cutting through the environment fog, and will proberly incorporate jenny's butterflies that could flutter in the sun. These extras should really bring the scene life.

Me and Rob made the decision a week ago to stick with rendering using Maya Software, the main reason was time restrictions, with the submission date in a month we needed to be both productive and realistic. We're looking to try to create a Mental Ray Render look with basic Ambient, Directional and Spot lighting, just means that we have to be clever, instead of ticking render setting boxes! Once the project has been submitted, we will test out the environments using the Mental Ray Maya Plug-in, and possibly re-render our film for the degree show, but if everything goes to plan the original lighting should be really good anyway.

The lighting that I visualised in my head was a bright, dense and colour rich jungle, the dream environment to really contrast with the dark, dull real world scene at the start of the film, his dream is meant to feel like an escape from the emotionless world he lives and works in.


Test Render - The lighting so far, produced by Rob, Jenny and Myself, created using one ambient light, simple fog and four spot lights to highlight the tv/sofa area and various parts of the deep jungle background to provide depth to the scene. (Maya Software, Render Time: 2mins 3secs)


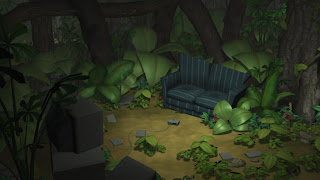
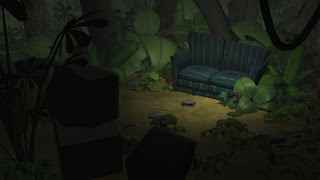
Test Render - Developed from lighting in render below, produced by Rob, Jenny and Myself, decided that the canopy would proberly create a very dark environment as sunlight doesnt always reach the jungle floor. The render still above is obviously too dark, ends up looking very similar to the starting lounge scene, doesnt incorporate much life within the set. (Maya Software, Render Time: 1mins 42secs)


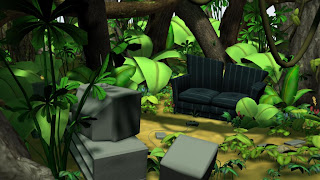
Test Render - Developed from lighting in render below, produced by Rob, Jenny and Myself. The Render shot above is too saturated and very bright, plus doesnt seem like it has any canopy, therefore light effects couldnt be used, almost gives an obvious fake CG feel to the set. (Maya Software, Render Time: 1mins 48secs)


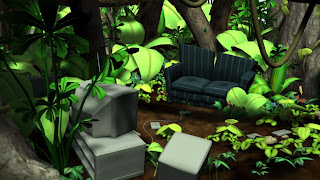
Test Render - First Lighting Test produced by Rob, Jenny and Myself. Scene colour very saturated and ground texture too dark, alot of development needed. Ambient Light and a Directional Light. (Maya Software, Render Time: 0mins 52secs)

Tuesday 13 May 2008

Production 'TO DO' List

Me and rob sat down and decided to work out what is left to do to make sure the film is completed on time, below is the list... take a copy if you need it! If you see anything you want to do just contact myself or rob and communicate what uve completed or looking to start. Just so we know whats going on! Thanks guys!


- PRODUCTION COMPLETION LIST -
By Me and Rob


Explorer UV

The UV maps for my Explorer model were produced by myself and finished on saturday. I found the unwrapping of the skin for this model really difficult at first, i havnt UVed a character this complex in a while, but after a couple of hours i was fine, cutting, pinning, planar mapping, unfolding, sewing! Ive hidden most of the texture seams by cutting the UV's around the inner folds of the clothes, this also helps ensure i get very defined colour textures for the garments (no other textures accidently painted on the garment next to it). Any visible seams (like the inside of the leg) I will mask by carefully blending/merging the textures when using photoshop. The only difficult part of the model was the hair becuase it remodelled it by adding more spikes and the bandana, its was almost impossible to unfold. The UVs on the model are near enough perfect for texturing, no stretching, this i wanted to make sure of so that texturing would be quick and easy. Due to the model having so many parts and to ensure that the textures would be at a high quality resolution, I had to produce two UV snapshots 2048 x 2048 for the one mesh. If the resolution ends up being too high, either too large a file size or the resolution not needed, it can be easily reduced in Photoshop.


Screenshot of my Explorer Character smoothed with UV maps applied
(Back and 3/4 Pose)


2048 x 2048 Texture Map One - Includes Body and Main Garments


2048 x 2048 Texture Map Two - Includes Face, Hair and Accessories

Mouse UV

Within the Lounge Set we are having a mouse run past the camera, Ben asked to modelled the low poly mouse but requested that I UV it, below shows the Mouse UV map that i produced ready for Ben to texture in Photoshop.


Wireframe Screen Shot for Autodesk Maya - Mouse Low Poly Model and UV Map


Mouse Low Poly Model UV Map - I found that this model was easy to UV due to the clean model produced, the only problem i had was that the UVs on the feet would not cut, I spent a while trying to work it out but stopped as it wasnt crucial to texture the model, taking into account the style the film is in, combined with the brief moment we see the character, the feet can be block coloured. I will however, investigate the problem further at a later date to ensure i know what to do if it ever happens to a model i produce.

Wednesday 7 May 2008

Corridoor Modelling


The Enterance to the Aztec Temple - Plants starting to be added, needs hanging vines and more tree roots around enterance, light behind the explorer when he steps into view, a silliouette will be cast over the ground, perhaps foggy rays of light shinning past his body?


Enterance Doorway to Rock Chamber - Ive just finished dressing this section with foliage, only the tree roots left to model, maybe use flame lit torches hanging from the walls, another idea i have had is to incorporate alpha channel planes with dusty webs, moss, vines, to cling to parts of the cracked walls and hang from the stone blocks. Just to give that extra essence of the tension, mystery and danger. To give the feeling of history, wild, untouched, overgrown, ancient.


The Ornate Stone Slab Model and layout - I modelled a skull into the slab, I kept the style simple but modelled it in a way so that it would be subtle, the eyes are deep so that they can start to glow a deep and deathly red as the explorer sets off the first trap. I tried to frame the shot with plants to give the composition depth.

Corridoor Modelling

The following models have been produced by myself, I wanted to keep the style consistant so I decided to dress the inside of the temple with Jenny's plants that I used to build the jungle. As well as use the pillars from rob's main chamber, I remodelled them into the walls, adding cracks and stone blocks. The Alpha channel hanging vines and tree roots I will model next week. As well as use my flame lit torch idea to light the sets.


Wireframe render of Trap Corridoor Design and Model - Generall layout and structure of corridoor, added cracks and holes and dressed the set with stone rocks, foliage, alpha channal vines and flame lit torches need to be added (35mm Widescreen, Focal Length 15).


Wireframe Render of Rock Chamber Ledge Layout and Model - This the section where the explorer will rope swing to safety, plants, tree roots and vines still to be added.


Wireframe Render of Rock Chamber Central Walkway Layout and Model - Plants starting to be added, tree roots are to be modelled, this part of the rock falling scene and will be lit to highlight its focus and importance within the set.


Wireframe Render of Enterance Corridoor Layout and Model - General structure modelled, set starting to be dressed with plants and stone blocks, again tree roots will be added for extra effect.


Wireframe Render of Enterance Corridoor including Falling Stone Door Area Layout and Model - Tree roots have started to be placed into the scene, as well as plants and stone blocks, the main thing needed will be my idea for the flame lit torches that i plan to model for next week, should generate powerful and dramatic lighting (35mm Widescreen, Focal Length 35).