Thursday, 15 May 2008

Jungle Lighting Idea

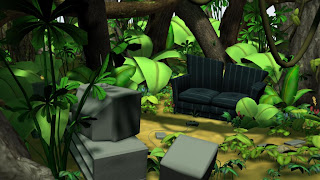
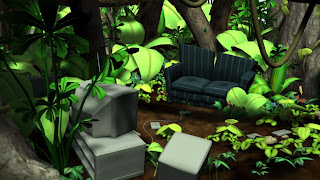
Ive been playing around with the jungle lighting a a bit recently and came up with an idea about creating the pockets of sunlight, the problem was that we can only use up to six spot lights in one scene, and the effect wasnt that sharp enough, so i desided to model a plane as a ceiling for the set, cut holes in various places and place a few directional lights above the set, each at about 0.5 intensity, the other lights in the scene were kept to produce the dark canopy part, the rendering took slightly longer, but on Robs PC was even quicker so render time shouldnt be a problem. The test actually worked with really pleasing results!

Rob and Myself will sit down and refine the idea. Once the intesities have be perfected, we can move the holes around to cast sunlight pockets over desired areas of trees and shrubs, and then finally add the 2D light ray planes and Jenny's butterflies. I asked Jenny to sought and cut down her modelled jungle leaves to place around the cut holes in the ceiling, this should remove the sharp polygon edges of the lightpockets and instead cast leaf shapes/shadows, thus creating a canopy effect!


Most recent Jungle Lighting Test, Produced by Myself - Using ceiling and holes idea, together with original lighting and added directional lights. Intensities and positioning still to be developed by Myself and Rob. (Maya Software, Render Time 5mins 3secs but only 2mins 20secs on Robs Computer)

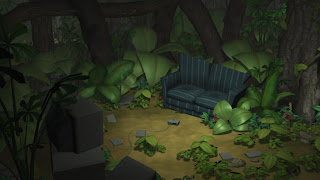
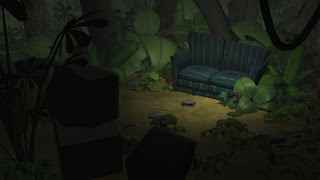
Jungle Lighting Test, Produced by Myself - Using ceiling and holes idea, together with original lighting and added directional lights. Intensity of Directional Lights needs to be increased, more sunlight pockets needed with better positioning. (Maya Software, Render Time 4mins 50secs)

Jungle Environment Lighting

As the modelling has almost stopped and the texturing well on its way, Myself, Jenny and Rob decided to sit down and discuss the lighting issues for the jungle. The render pics below show some of the many stages of testing we have done so far.

Im really happy with the development so far, but im still only 90% sure that this will be the lighting for the final render, the dark shadows cast by the canopy above, the depth of the scene and the fog work really well... but it still needs something to bring it to life. I visualised it with large pockets of sunlight, its rays softly cutting through the environment fog, and will proberly incorporate jenny's butterflies that could flutter in the sun. These extras should really bring the scene life.

Me and Rob made the decision a week ago to stick with rendering using Maya Software, the main reason was time restrictions, with the submission date in a month we needed to be both productive and realistic. We're looking to try to create a Mental Ray Render look with basic Ambient, Directional and Spot lighting, just means that we have to be clever, instead of ticking render setting boxes! Once the project has been submitted, we will test out the environments using the Mental Ray Maya Plug-in, and possibly re-render our film for the degree show, but if everything goes to plan the original lighting should be really good anyway.

The lighting that I visualised in my head was a bright, dense and colour rich jungle, the dream environment to really contrast with the dark, dull real world scene at the start of the film, his dream is meant to feel like an escape from the emotionless world he lives and works in.


Test Render - The lighting so far, produced by Rob, Jenny and Myself, created using one ambient light, simple fog and four spot lights to highlight the tv/sofa area and various parts of the deep jungle background to provide depth to the scene. (Maya Software, Render Time: 2mins 3secs)


Test Render - Developed from lighting in render below, produced by Rob, Jenny and Myself, decided that the canopy would proberly create a very dark environment as sunlight doesnt always reach the jungle floor. The render still above is obviously too dark, ends up looking very similar to the starting lounge scene, doesnt incorporate much life within the set. (Maya Software, Render Time: 1mins 42secs)


Test Render - Developed from lighting in render below, produced by Rob, Jenny and Myself. The Render shot above is too saturated and very bright, plus doesnt seem like it has any canopy, therefore light effects couldnt be used, almost gives an obvious fake CG feel to the set. (Maya Software, Render Time: 1mins 48secs)


Test Render - First Lighting Test produced by Rob, Jenny and Myself. Scene colour very saturated and ground texture too dark, alot of development needed. Ambient Light and a Directional Light. (Maya Software, Render Time: 0mins 52secs)

Tuesday, 13 May 2008

Production 'TO DO' List

Me and rob sat down and decided to work out what is left to do to make sure the film is completed on time, below is the list... take a copy if you need it! If you see anything you want to do just contact myself or rob and communicate what uve completed or looking to start. Just so we know whats going on! Thanks guys!


- PRODUCTION COMPLETION LIST -
By Me and Rob


Explorer UV

The UV maps for my Explorer model were produced by myself and finished on saturday. I found the unwrapping of the skin for this model really difficult at first, i havnt UVed a character this complex in a while, but after a couple of hours i was fine, cutting, pinning, planar mapping, unfolding, sewing! Ive hidden most of the texture seams by cutting the UV's around the inner folds of the clothes, this also helps ensure i get very defined colour textures for the garments (no other textures accidently painted on the garment next to it). Any visible seams (like the inside of the leg) I will mask by carefully blending/merging the textures when using photoshop. The only difficult part of the model was the hair becuase it remodelled it by adding more spikes and the bandana, its was almost impossible to unfold. The UVs on the model are near enough perfect for texturing, no stretching, this i wanted to make sure of so that texturing would be quick and easy. Due to the model having so many parts and to ensure that the textures would be at a high quality resolution, I had to produce two UV snapshots 2048 x 2048 for the one mesh. If the resolution ends up being too high, either too large a file size or the resolution not needed, it can be easily reduced in Photoshop.


Screenshot of my Explorer Character smoothed with UV maps applied
(Back and 3/4 Pose)


2048 x 2048 Texture Map One - Includes Body and Main Garments


2048 x 2048 Texture Map Two - Includes Face, Hair and Accessories

Mouse UV

Within the Lounge Set we are having a mouse run past the camera, Ben asked to modelled the low poly mouse but requested that I UV it, below shows the Mouse UV map that i produced ready for Ben to texture in Photoshop.


Wireframe Screen Shot for Autodesk Maya - Mouse Low Poly Model and UV Map


Mouse Low Poly Model UV Map - I found that this model was easy to UV due to the clean model produced, the only problem i had was that the UVs on the feet would not cut, I spent a while trying to work it out but stopped as it wasnt crucial to texture the model, taking into account the style the film is in, combined with the brief moment we see the character, the feet can be block coloured. I will however, investigate the problem further at a later date to ensure i know what to do if it ever happens to a model i produce.

Wednesday, 7 May 2008

Corridoor Modelling


The Enterance to the Aztec Temple - Plants starting to be added, needs hanging vines and more tree roots around enterance, light behind the explorer when he steps into view, a silliouette will be cast over the ground, perhaps foggy rays of light shinning past his body?


Enterance Doorway to Rock Chamber - Ive just finished dressing this section with foliage, only the tree roots left to model, maybe use flame lit torches hanging from the walls, another idea i have had is to incorporate alpha channel planes with dusty webs, moss, vines, to cling to parts of the cracked walls and hang from the stone blocks. Just to give that extra essence of the tension, mystery and danger. To give the feeling of history, wild, untouched, overgrown, ancient.


The Ornate Stone Slab Model and layout - I modelled a skull into the slab, I kept the style simple but modelled it in a way so that it would be subtle, the eyes are deep so that they can start to glow a deep and deathly red as the explorer sets off the first trap. I tried to frame the shot with plants to give the composition depth.

Corridoor Modelling

The following models have been produced by myself, I wanted to keep the style consistant so I decided to dress the inside of the temple with Jenny's plants that I used to build the jungle. As well as use the pillars from rob's main chamber, I remodelled them into the walls, adding cracks and stone blocks. The Alpha channel hanging vines and tree roots I will model next week. As well as use my flame lit torch idea to light the sets.


Wireframe render of Trap Corridoor Design and Model - Generall layout and structure of corridoor, added cracks and holes and dressed the set with stone rocks, foliage, alpha channal vines and flame lit torches need to be added (35mm Widescreen, Focal Length 15).


Wireframe Render of Rock Chamber Ledge Layout and Model - This the section where the explorer will rope swing to safety, plants, tree roots and vines still to be added.


Wireframe Render of Rock Chamber Central Walkway Layout and Model - Plants starting to be added, tree roots are to be modelled, this part of the rock falling scene and will be lit to highlight its focus and importance within the set.


Wireframe Render of Enterance Corridoor Layout and Model - General structure modelled, set starting to be dressed with plants and stone blocks, again tree roots will be added for extra effect.


Wireframe Render of Enterance Corridoor including Falling Stone Door Area Layout and Model - Tree roots have started to be placed into the scene, as well as plants and stone blocks, the main thing needed will be my idea for the flame lit torches that i plan to model for next week, should generate powerful and dramatic lighting (35mm Widescreen, Focal Length 35).